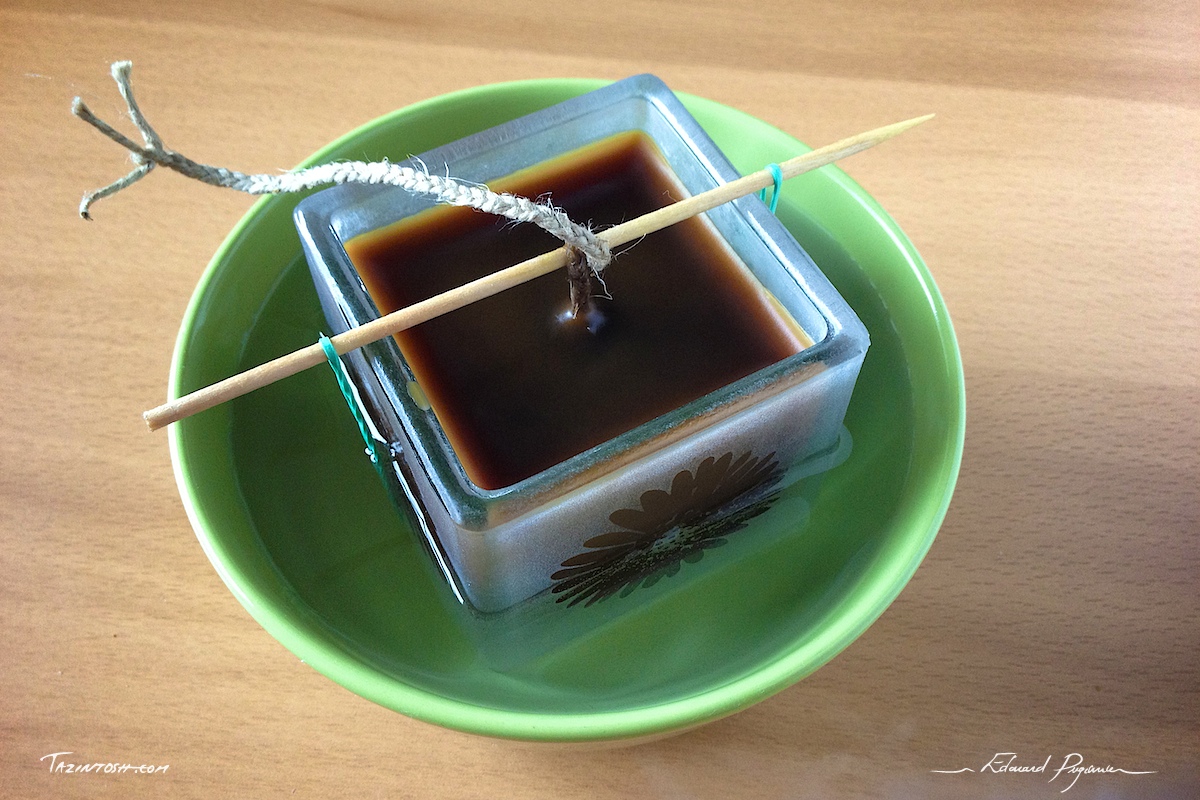
How to do?
- When a candle is finished, get the wax (dry) and store the pieces (≈ 2 cm per side max.) in an empty jamjar. I do not care much about the wax color, with me, everything is mixed, but do as you please;
- When you think you have enough wax to create one or more new candles, select the containers of your choice (no plastic or burning material there huh… I decline any responsibility ^^), ideally those candles already purchased;
- To melt the wax, I put the jamjar thus filled in a double boiler. Progressively, the pieces of wax will melt completely and the “solution” will become particularly hot and liquid. Always use caution;
- You'll need a wick. This can be bought, but I make them. So while the wax melts, you can make it. For this, use a natural string, not nylon, etc. (if you can not make a difference, ignite one end, if it melts, do not use!). Depending on the thickness of your string, it may be necessary to make a braid to give it a more appreciable diameter. If you need several wicks braided, make one big wick and cut it;
- Glue one end of your new wick to the bottom. Once properly fixed, find a way to stretch your wick vertically (see the photo illustration above to see my method);
- Your waw has probably melted now. If it appends long before you finish the rest of your work, leave on low heat, always in a double boiler, and remember to redo the water level;
- Now it's time to fill the container of liquid wax. Prior to, place your container in a bath of cold water. Always with extreme caution when handling something hot, pour hot wax into your container to desired level;
- Just before leaving your candle cool, dip ≈ 1 cm from the top of the wick into wax and then retighten. This will allow you to light the candle easier;
- After a few hours off, your candle is ready!
During cooling, the wax will probably collapse around the edges of the wick. By putting a little wax aside, you can redo the level.